For Server Owners
Server Setup Guide
Setting up a Honse Farm server is straightforward - the entire process takes about 10 minutes and requires running just two commands on your Linux VPS or dedicated server.
Step 1: Install Prerequisites
Run this command to install the technical prerequisites on your server, including .NET and other required dependencies:
curl -fsSL4 https://get.honse.farm/honsefarm-install.sh | sudo bashThis automated script will detect your Linux distribution and install everything needed to run the Honse Farm server.
Step 2: Run the Installer
Once the prerequisites are installed, start the interactive installer:
cd /opt/honsefarm-installer && sudo -E dotnet HonseFarm.Installer.dllThis kicks off the Honse Farm installer, which will guide you through the configuration process.
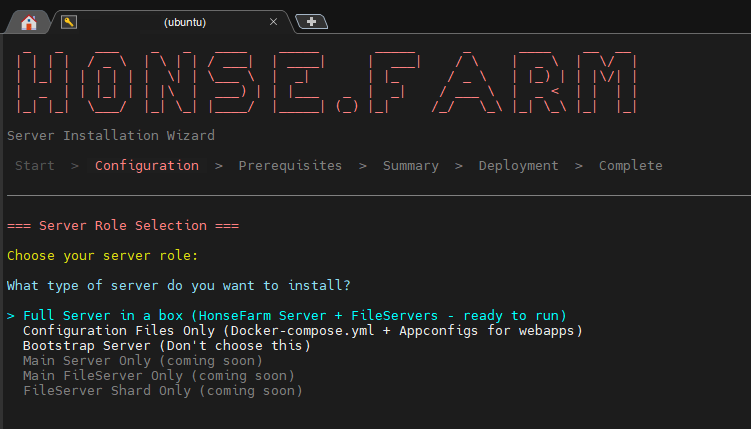
Configuration Options
When running the installer, you'll be presented with several configuration options. We recommend selecting "Install full server in a box" - this option handles everything for you:
- Docker container orchestration
- Database setup and initialization
- TLS certificate provisioning via Let's Encrypt
- Reverse proxy configuration
- Admin panel deployment
The installer will walk you through each step with clear prompts and validation.
Enable Your Server
After installation completes, your server starts in dry-run mode for testing purposes. This allows you to verify everything is working before opening it to users.
To enable your server for production use:
- Visit your admin panel at
https://admin.yourdomain.com - Navigate to the server settings
- Disable dry-run mode
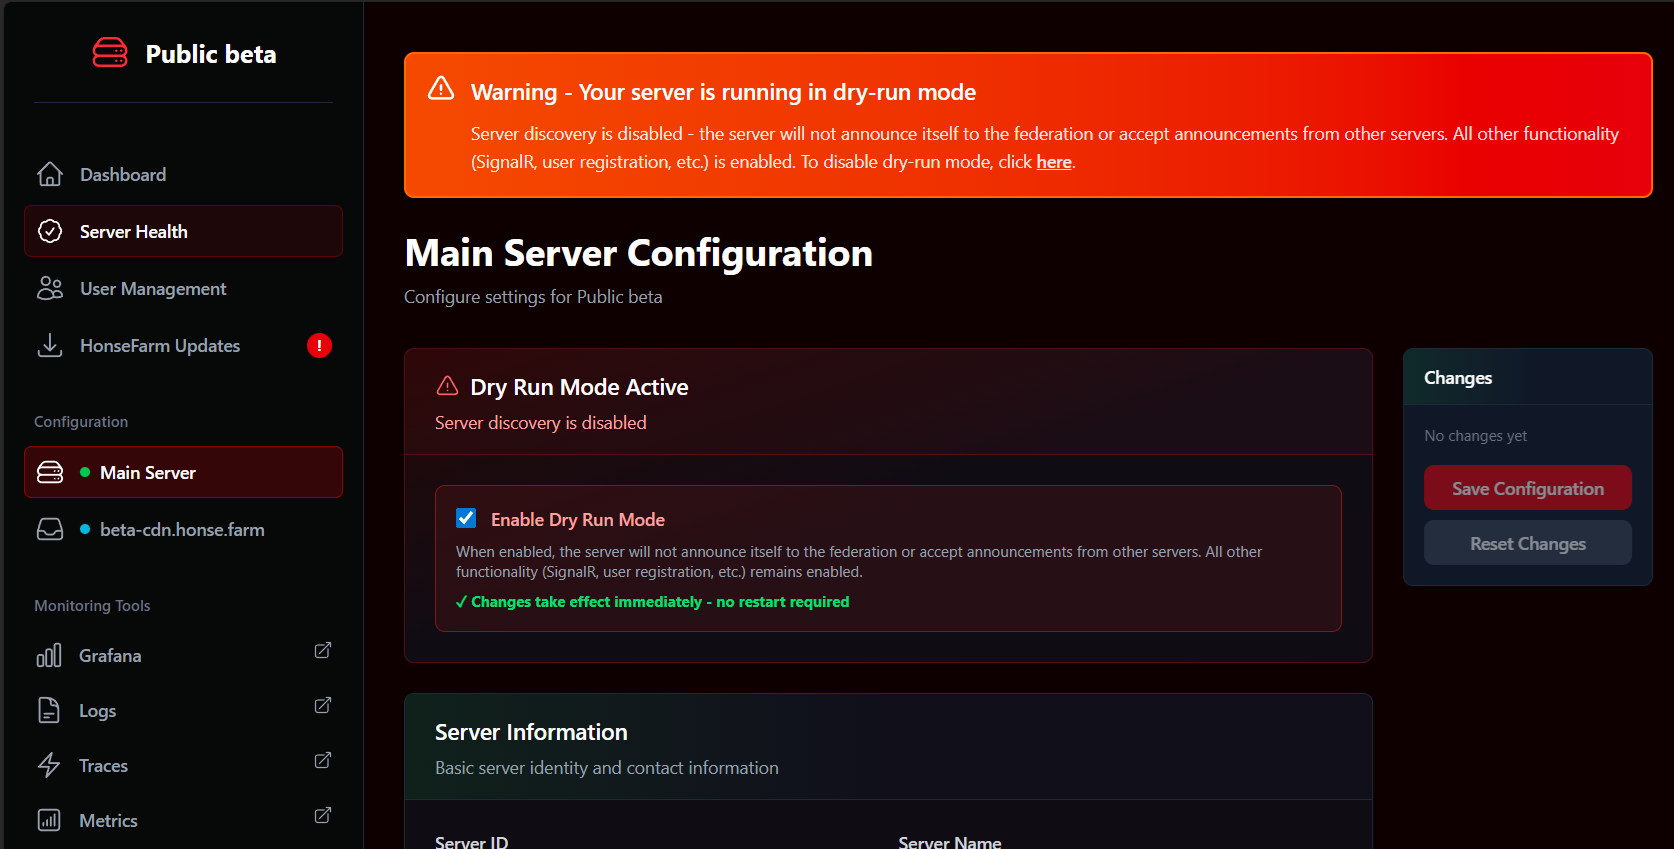
Once dry-run mode is disabled, your server is live and ready to accept connections from Honse Farm clients.
That's it! Your federated Mare Synchronos server is now running. Users can connect to your server, and if you've configured it as a public server, it will participate in the federation network.